The Sekonic Light Meter can and even needs to be calibrated with your camera. You can calibrate your light meter in two ways:
- Full calibration (I recommend this method).
- Quick correction of exposure indications.
Below I will show you both of these methods, step by step.
Full calibration of the Sekonic L-858D light meter using Data Transfer Software.
We start by preparing 3 photos:
I mounted the Datacolor Spydercheckr on the c-stand and positioned the camera on the tripod in such a way that the target occupied as much of the frame as possible. I prepared a flash in a 130 cm umbrella with a diffuser – I need a wide, even light to illuminate the stencil.
Using the default profile in my Sekonic L858D light meter, I set the exposure to: ISO 100, 1/125s and adjusted the light until the light meter showed me exactly f/5.6.
I set the camera according to the light meter: ISO 100, 1/125s, f/5.6 and took the first picture. This photo has the correct exposure (although it may differ from your expectations, after all, we calibrate our set for something, right?)⬇︎

Then I change the aperture on the camera to f/2 and take the picture. I don’t change the flash setting! This photo will be overexposed by +3EV and that’s how it’s supposed to be.⬇︎

Now I set the aperture on the camera to f/16 and take the third picture; I didn’t change the flash power, so this photo will be underexposed by -3EV. That’s how it’s supposed to be.⬇︎

Important: I make one more measurement, using the „scope” of the light meter, i.e. Reflected Light „Spot” measurement, measuring on a large, gray area on my stencil. The light meter reading is 8.0/1

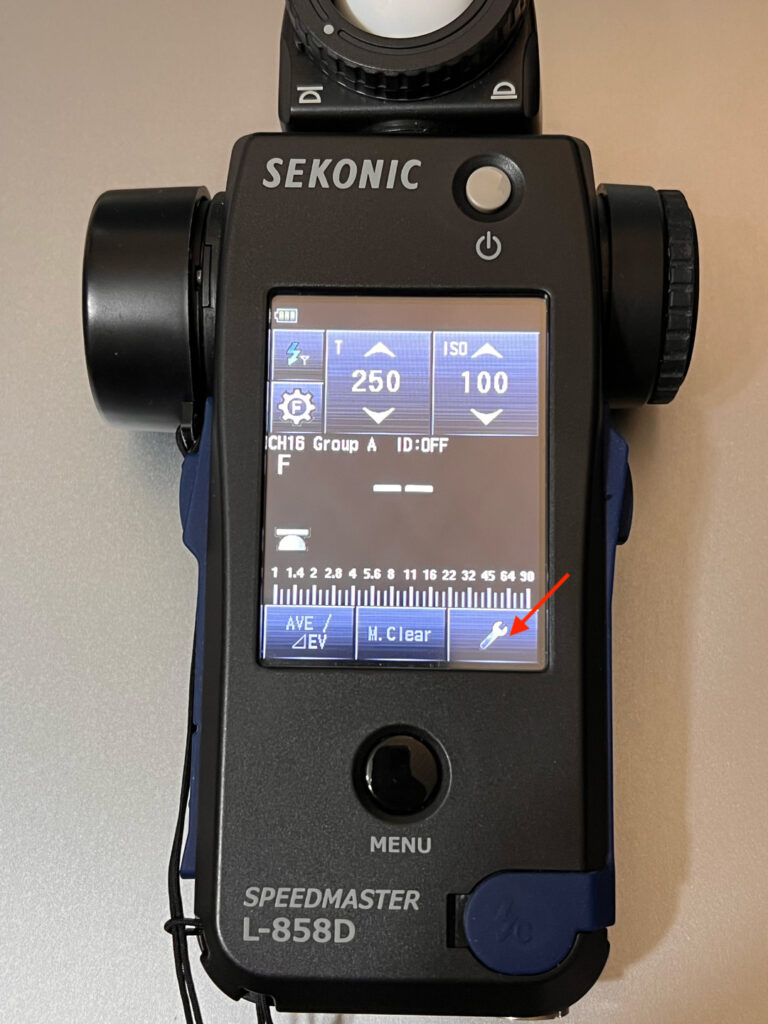
How to switch the Sekonic L-858D light meter from Incident Light to Reflected Light?
- On the main screen, press the „wrench” icon
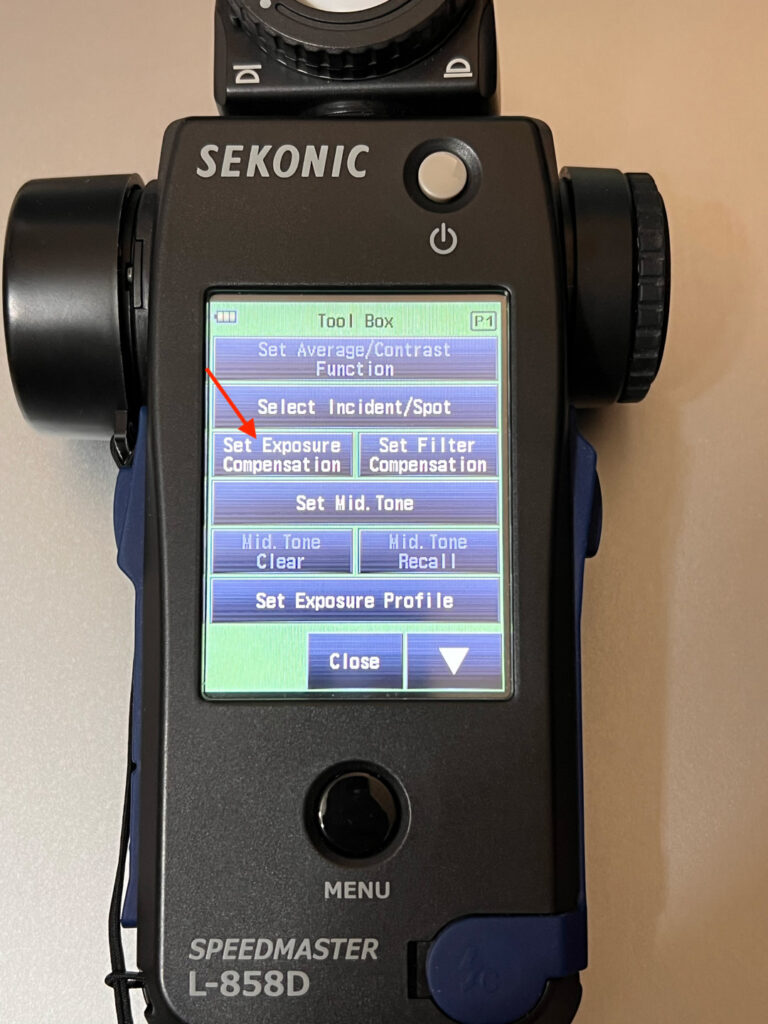
- From the menu that appears, select the „Select Incident/Spot” option
- We mark the option we are interested in; I chose Reflected Light „Spot” and now my light meter is ready to measure through the built-in scope.
I export these three photos in a small format (1080 on the short edge) but keep all EXIF – this is important! I copy the photos to one directory on the desktop.
Sekonic provides free software to create a Camera/Lens/ISO/Shutter speed profile: the Data Transfer Software tool can be downloaded from the manufacturer’s website. I install Data Transfer Software, then run the program and click the Create New Profile button, then select Advanced Mode.
The profile wizard asks me to select a stencil, I choose the one I used, which is Datacolor Spydercheckr.⬇︎

I then specify whether my profile will be for steady light or flash light; I chose the flash light.⬇︎

On the next tab, I enter the parameters at which I took the photos: on the left the reading for the lumisphere measurement of the light meter (f/5.6) on the right for the spot metering (f/8.0/1)⬇︎
Now it’s the turn to select the photos I took earlier: I click the „Select Folder” button and indicate the folder in which I have prepared photos. Thumbnails of all photos in the catalog will appear, I indicate three photos of the target by checking the checkboxes in the upper right corner of the thumbnail and click the Next button.⬇︎
It’s time to tell the program where to get the data for analysis; I move the green crosses into the four corners of my stencil above the first photo. When I click on the photo, a green „done” icon appears. I took the photos with the camera on a tripod, so the other two photos also turn green, „done.” I click Next.⬇︎
After a moment of analysis, a screen with a graph appears; this is the visual representation of my camera’s tonal range. I took the advice of experienced people and slightly expanded this range by moving the red and green lines left and right. Practice will show whether such manual editing of the profile made sense. I press the save button and save my profile under the name Canon EOS R5.⬇︎
It’s time to upload the profile to my light meter. After saving the profile, I do not close the program window, in the window on the left, Exposure Profile List, I can see the profiles I created.
I connect the turned off Sekonic light meter with a USB cable and only then turn on my device. The program reads the content of the light meter’s memory and shows it to me in the window at the bottom right: Current Profile Setting.
In the window on the left, I select the default profile CAMERA_DEFAULT and select a place for it in the window on the right: No.01. I do the same with the newly created Canon EOS R5 profile – I click on this profile in the left pane and then select a place for it in the right pane: No.02. I make sure I’ve marked everything correctly and click the Transfer to Light Meter button.
After the transfer is complete, I close the program, turn off the light meter’s power and disconnect the USB cable from it.
I turn on the light meter and by pressing the „wrench” icon I enter the Tool Box menu. I choose the „Set Exposure Profile” option. I see two profiles: CAMERA_DEFAULT and Canon EOS R5. I select my new Canon EOS R5 profile by touch and click „Close”.
Ready. My light meter is now calibrated and ready to work with my camera.
The exposure profile created according to the instructions will allow you to work with the light meter with the greatest precision.
Quick correction of exposure indications
As a last resort, you can use a faster method that does not require any template, but it will not be as accurate.
- Set the flash light, measure with a light meter.
- Set the camera according to the light meter.
- Take a photo.
- Open the photo in your RAW Editor (Capture One or Lightroom)
- Make the necessary adjustments with the Exposure slider (if the photo is too dark, raise the exposure, if the photo is too bright, lower the exposure) until you consider the correct exposure.
Remember: correct exposure always leaves some margin, the highlights should not be on the very border!
If your manual exposure correction is, for example: +0.7EV, you should correct the light meter by exactly this value. How to go about it?
On the light meter, press the Wrench icon, the Tool Box menu will open ⬇︎

Press the menu item Set Exposure Compensation ↓

Set the number according to what you changed when editing the RAW file ⬇︎

Press OK to return to the main screen.
Measure the light, take another photo and check if the correction turned out to be sufficient. If not, repeat the procedure and increase/decrease exposure compensation.
I took sample photos of the color guide and the mannequin; you can compare your photos to mine – pay close attention to the Histogram!
You can download the original RAW files for comparison from my Dropbox.


